Introduction
Are you looking to add a touch of elegance and safety to your space? A stainless steel handrail might be just what you need. Whether you're renovating your home or updating your commercial space, installing a stainless steel handrail can elevate the overall look and provide a secure grip for those navigating the area. But how do you go about fitting a stainless steel handrail?
In this article, we will guide you through the step-by-step process, from measuring and planning to the finishing touches and maintenance. By following these instructions and gathering the necessary tools and materials, you'll be on your way to creating a stylish and functional handrail that will stand the test of time. Let's get started!
Step 1: Measuring and planning

When it comes to installing a handrail, one of the first steps is measuring and planning. This crucial step ensures that the handrail will fit perfectly and provide the necessary support and safety. In this article, we will discuss the importance of measuring and planning, as well as provide tips and guidelines to help you with this process.
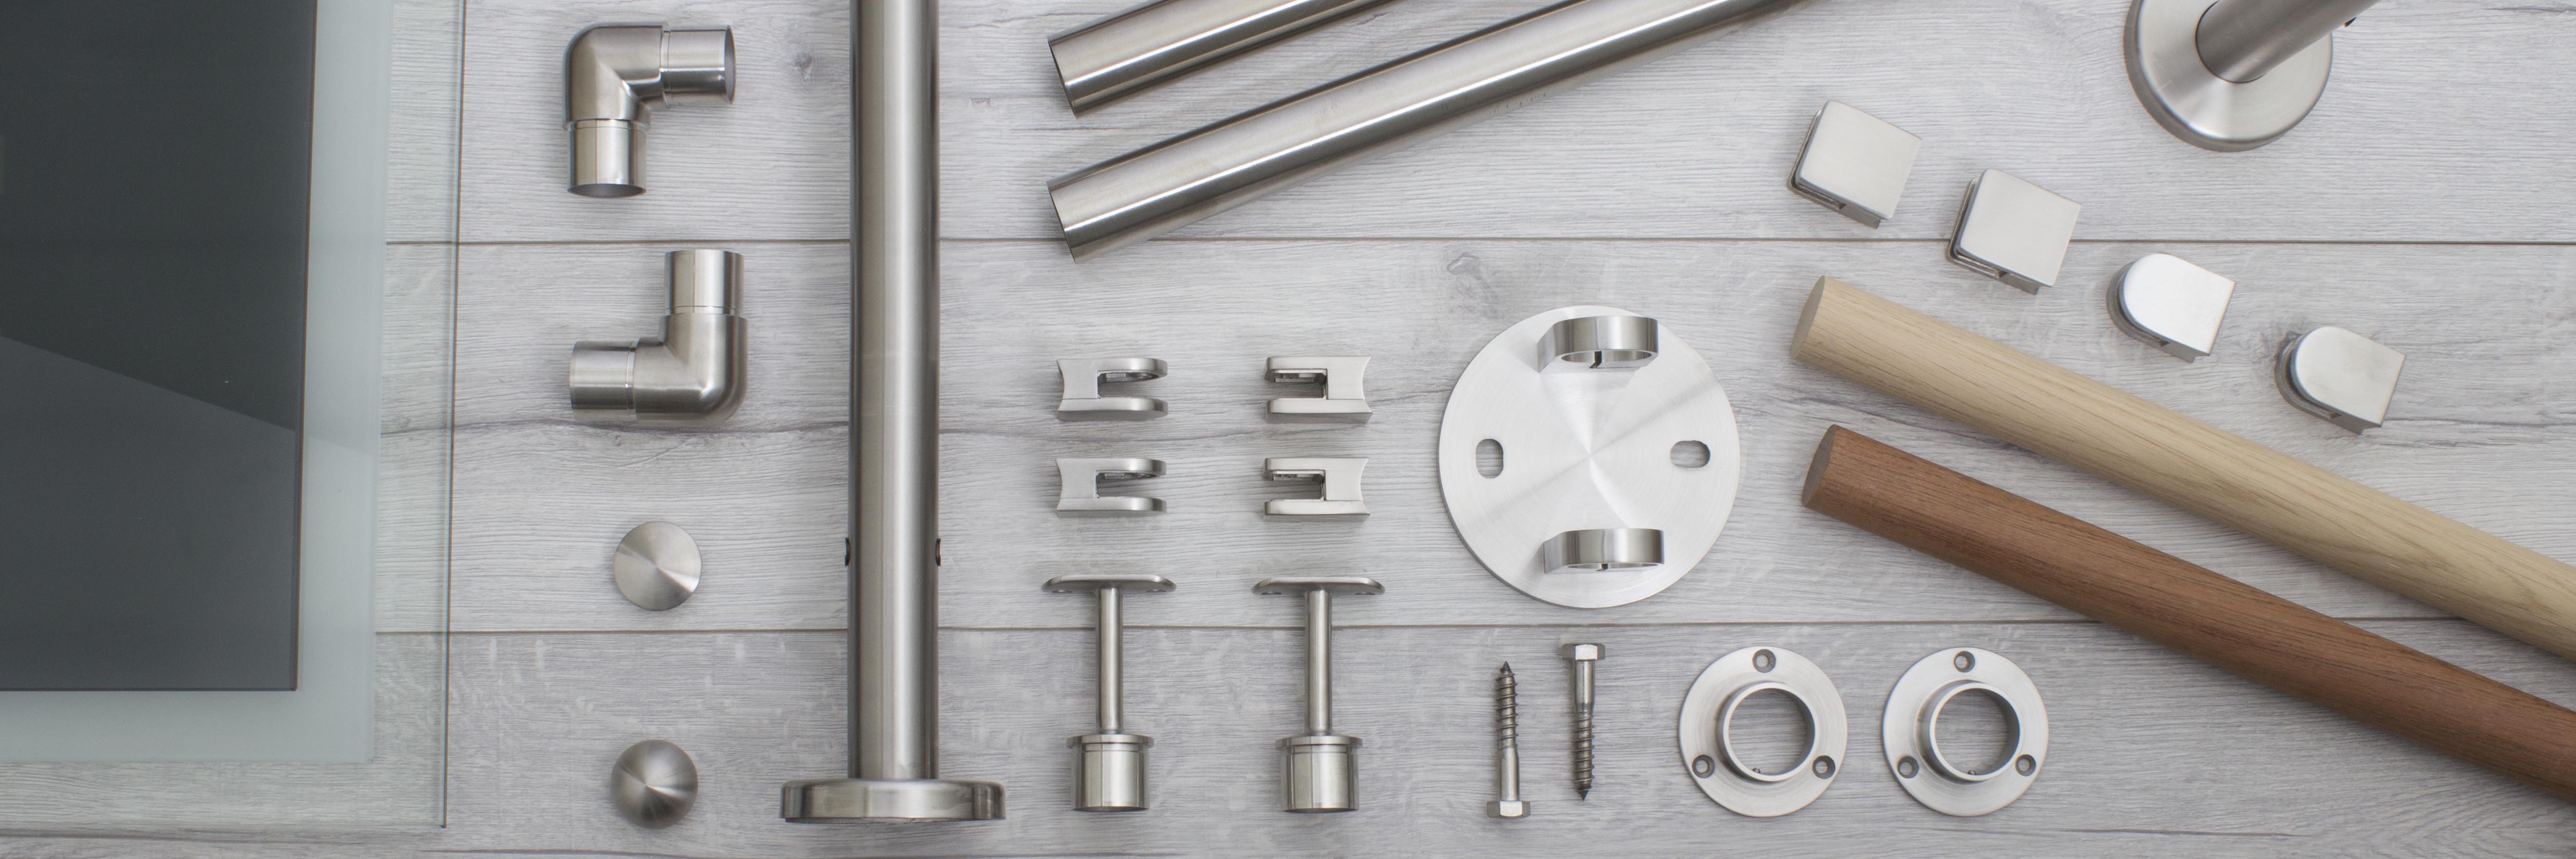
Before you start measuring, it is essential to have a clear understanding of the type of handrail you want to install. In this case, we will focus on stainless steel handrail brackets.
These brackets are known for their durability, strength, and sleek appearance. With their corrosion-resistant properties, they are an excellent choice for both indoor and outdoor applications.
To begin the measuring process, gather all the necessary tools such as a tape measure, level, and pencil. Start by determining the height at which you want the handrail to be installed. As a general rule, the handrail should be positioned between 34 to 38 inches above the stair tread or the floor. This height ensures optimal safety and comfort for users.
Next, measure the length of the handrail. Start at the top of the stairs or the starting point of the handrail and measure all the way to the end point. Make sure to take accurate measurements, as any discrepancies can affect the overall fit and stability of the handrail.
Once you have determined the height and length, it is time to plan the installation. Consider the layout and design of the area where the handrail will be installed. Take note of any obstacles or obstructions that may affect the installation process. This could include walls, doors, or other fixtures that may require special consideration.
When planning the installation, it is also important to consider the spacing of the handrail brackets. The brackets provide support and stability to the handrail, so they need to be spaced adequately. As a general guideline, aim for a spacing of around four feet between each bracket. This ensures that the handrail is secure and can withstand the weight and pressure applied to it.
Step 2: Gathering the necessary tools and materials
When it comes to installing a stainless steel handrail bracket, having the right tools and materials is crucial. This step is essential to ensure a smooth and successful installation process. In this article, we will guide you through the process of gathering the necessary tools and materials for this project.
The first tool you will need is a measuring tape. Accurate measurements are key to ensuring that your handrail bracket fits perfectly in its designated spot. Measure the length and height where the handrail will be installed, as well as the distance between the brackets. This will help you determine the number of brackets needed for optimal support.
Next, you will need a pencil or a marker to mark the spots where the brackets will be installed. This will serve as a guide during the installation process, ensuring that the brackets are placed accurately. Make sure to mark the spots on both the wall and the handrail to ensure proper alignment.
Now, let's move on to the materials needed for this project. The most important material is, of course, the stainless steel handrail bracket itself. Look for a high-quality bracket that is specifically designed for durability and stability. A sturdy bracket will provide the necessary support and ensure the safety of those using the handrail.
You will also need screws or bolts to secure the bracket to the wall and the handrail. Make sure to choose screws or bolts that are suitable for the type of wall you have. If you are unsure, consult with a hardware specialist who can recommend the appropriate fasteners for your specific needs.
Additionally, you may need wall anchors if you are installing the handrail bracket on a hollow wall. These anchors provide extra support and stability, ensuring that the bracket stays securely in place.
Lastly, don't forget about safety equipment. When working with tools and materials, it's important to prioritize safety. Wear protective goggles to shield your eyes from any debris, and gloves to protect your hands from sharp edges.
Step 3: Preparing the installation area

When it comes to installing a stainless steel handrail bracket, proper preparation of the installation area is crucial. This step ensures a smooth and secure installation, providing a sturdy support for the handrail. Whether you are installing a handrail in your home or a commercial space, following these guidelines will ensure a successful and long-lasting installation.
The first step in preparing the installation area is to measure and mark the desired location for the handrail bracket. Using a measuring tape, determine the appropriate height and position for the bracket.
It is important to consider both the functionality and aesthetics when choosing the placement. Once you have determined the location, use a pencil or marker to mark the spot on the wall or surface.
Next, it is important to ensure that the surface is clean and free of any debris or obstructions that may hinder the installation process. Use a brush or a cloth to remove any dust, dirt, or loose particles from the area. This will provide a clean and smooth surface for the bracket to adhere to.
Before proceeding with the installation, it is essential to gather all the necessary tools and materials. This includes the stainless steel handrail bracket, screws, anchors, and a drill. Make sure that the screws and anchors are compatible with the bracket and the surface you are installing it on. Using the wrong size or type of screws and anchors can compromise the stability of the installation.
Once you have gathered the tools and materials, it is time to begin the installation process. Start by drilling pilot holes at the marked spots on the wall or surface. These pilot holes will serve as a guide for screwing in the screws and anchors. Make sure to drill the holes at the appropriate depth to ensure a secure fit.
After drilling the pilot holes, align the stainless steel handrail bracket with the holes and attach it to the surface using the screws and anchors. Make sure to tighten the screws firmly, but be careful not to over-tighten them, as this can damage the bracket or the surface.
Once the bracket is securely installed, double-check its stability by applying pressure or pulling on it. It should feel sturdy and not move or wobble. If there is any movement, re-tighten the screws or consider using additional anchors for added support.
Step 4: Installing the handrail

Installing the handrail is a crucial step in ensuring the safety and stability of any staircase or elevated platform. Whether it's in a residential or commercial setting, a handrail provides support and guidance for individuals as they navigate through different levels. In this article, we will discuss the importance of installing a handrail and provide a step-by-step guide on how to do it.
The first step in installing a handrail is to gather all the necessary materials and tools. One key component is the stainless steel handrail bracket. This bracket serves as the support system for the handrail and ensures its stability. When choosing a stainless steel handrail bracket, it's important to consider its quality and durability.
Opting for a high-quality bracket ensures that the handrail will withstand the test of time and provide reliable support.
Once you have the stainless steel handrail bracket, the next step is to measure and mark the appropriate height for the handrail. This measurement should be based on local building codes and regulations, as they vary from one jurisdiction to another. It's crucial to comply with these regulations to ensure the safety and accessibility of the handrail.
After measuring and marking the height, the next step is to mark the positions for the bracket installation. It's recommended to use a level to ensure that the brackets are aligned correctly.
This step is crucial to maintain the stability and functionality of the handrail. Once the positions are marked, use a drill to create pilot holes for the bracket screws.
Once the pilot holes are made, it's time to attach the stainless steel handrail brackets. Align the brackets with the marked positions and use screws to secure them in place. It's important to ensure that the brackets are tightly fastened to provide adequate support for the handrail. A loose bracket can compromise the stability and safety of the handrail.
After the brackets are installed, the next step is to attach the handrail itself. Depending on the design and material of the handrail, there are different methods of attachment. It's crucial to follow the manufacturer's instructions for a proper and secure attachment. In the case of a stainless steel handrail, it's common to use screws or bolts to secure it to the brackets.
Finally, once the handrail is securely attached, it's important to test its stability and functionality. Apply pressure to different areas of the handrail to ensure that it can support the weight and provide a sturdy grip. If any issues or concerns arise during this testing phase, it's important to address them promptly to ensure the safety of individuals using the handrail.
Step 5: Finishing touches and maintenance

Finishing touches and maintenance are crucial steps in ensuring the longevity and functionality of any project. When it comes to stainless steel handrail brackets, paying attention to these final details can make all the difference.
One of the key aspects of finishing touches is ensuring a seamless installation. Stainless steel handrail brackets are known for their durability and strength, but proper installation is essential to maximize their potential. Ensuring that the brackets are securely attached to the wall or surface is paramount. This not only guarantees the safety of those using the handrail but also prevents any potential damage to the surrounding area.
In addition to installation, regular maintenance is necessary to keep stainless steel handrail brackets in top condition. Routine cleaning is vital to prevent the buildup of dirt, dust, and other debris that can compromise the appearance and functionality of the brackets.
Using a mild detergent and warm water, gently scrub the brackets to remove any grime. Avoid using abrasive cleaners or tools that could scratch the stainless steel surface.
Another important aspect of maintenance is inspecting the brackets for any signs of wear or damage. Over time, stainless steel handrail brackets may experience corrosion or develop small cracks. It is essential to catch these issues early on to prevent further damage. Regularly check the brackets for any signs of rust or deterioration, and promptly address any concerns.
In addition to cleaning and inspecting, lubricating the brackets is also recommended. Applying a small amount of lubricant to the moving parts of the brackets can help prevent friction and ensure smooth operation. This simple step can significantly extend the lifespan of the brackets and enhance their overall performance.
Conclusion
The article emphasizes the importance of measuring, planning, gathering tools, preparing the installation area, and proper installation when installing stainless steel handrail brackets. It highlights the need for accurate measurements, high-quality materials, and following manufacturer's instructions. The article also mentions the importance of complying with building codes and regulations, testing the handrail's stability, and maintaining the brackets through regular cleaning, inspection, and lubrication. Following these steps will result in a secure, aesthetically pleasing, and durable handrail installation.


